

After you navigate to the “Database” directory, click on the “Edit” button on the left side of the desired item,
i.e., desired database, to enter the edit mode.

This will open the same screen as for creating a database and you can change all the settings in the Database tab,
as well as edit field properties in the Form tab or add new or delete existing fields and/or sections.

Assume you want to rename a field “TaxNr” to “TIN” and to change the field type form “Text” to “Integer Number”.
Go to the “Form” tab and find “TaxNr” field. In the upper right corner of the field area, click on the “Edit” button.
This will initiate appearance of a pop-up field-setting dialog, like the one that appears when you first create a field.
Here you can change all field properties.
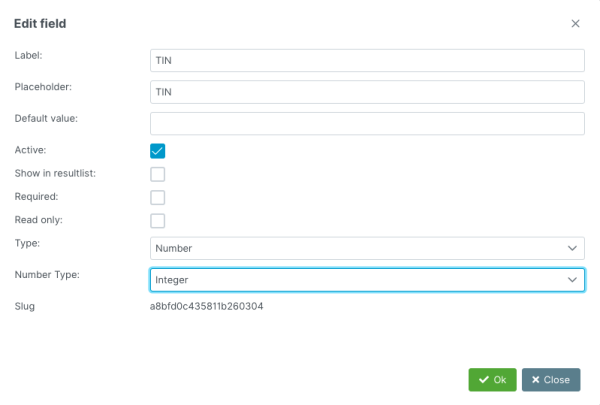
Click on the “Ok” button to save changes.
Delete field
Now assume you want to change the type of the field “Active” in “Customers” database from “Dropdown Field” to “Checkbox Field”.
In the “Form” tab, find “Active” field and remove it.
This can be done by clicking on the “Delete” button on the upper right side of the field area.
This will initiate appearance of a pop-up window that will ask you to confirm deletion of the field. Click “Yes” to proceed.
Add new field
Select “Checkbox Field” from the list of field types on the left and drag it to the desired location, which is under the “Industry” field.
This will initiate appearance of a pop-up field-setting dialog, where you should enter following properties:
-
Label: Active
-
Default value: Yes
-
Check: Active, Show in resultlist, Required
-
Options: Yes
Click on “Ok” button to save field and its properties.
Relocate field
As you can see, these activities changed the order of fields in the right column of the “Business” section
and now field “Industry” is positioned above the “Active” field.
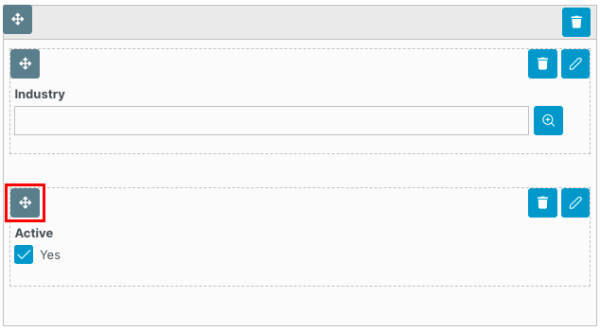
In order to change the positioning of the fields, click on and hold the button in the upper left corner of the field area,
while you drag the field to the desired position – in our case, above the “Industry” field.
Release the button when you place the field to the desired location.
Note that you can drag a field into a completely different column or section.
In the end, the “Business” section of “Customers” database will look like in the image below:
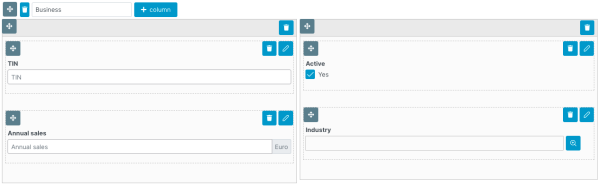
Finally, click on the “Save & exit” button to save introduced changes to the “Customers” database.
Note: Sections and Columns can be deleted or relocated using the same buttons as fields.
Each section/column area has their own “Delete” and “Relocate” buttons.
For more details on editing an existing database, see User Documentation.


