Customer is one realization of “Customers” database, i.e., one concrete entry to this database.
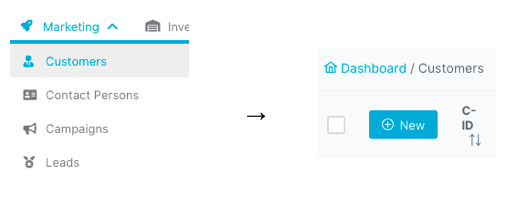
To create a new Customer, navigate to the “Customers“ database under “Marketing” menu
and click on a “New” button in the upper left corner.
This will initiate appearance of a new screen, where all information about a new customer shall be entered.
The fields of this form are explained in the table below:
|
Field Name |
Description |
Example data |
|---|---|---|
|
Name* |
Full name of the customer / company |
Mary Grace |
|
Phone number* |
Contact phone number of the customer |
|
|
Fax |
Facsimile number of the customer |
889 182 5297 |
|
|
Customer's e-mail address |
mg123@answers.com |
|
Accounting E-Mail |
Customer's official accounting e-mail address |
mg.acc@google.com |
|
Website |
Official website of the customer |
quantcast.com |
|
Address* |
Street and number of customer's address |
22 Annamark Court |
|
P.O. Box |
Uniquely addressable lockable box located on the premises of a post office station, to which any documents and products for the customer can be sent |
|
|
Postcode* |
Postal code of customer's address |
9806 |
|
City* |
City of the customer's address |
Esperanza |
|
Province* |
Province of the customer's address |
Sultan Kudarat |
|
Country* |
Country of the customer's address |
Philippines |
|
TaxNr |
Taxpayer Identification Number |
24-113-8906 |
|
Annual sales |
Annual sales worth expressed in euros |
705007.63 |
|
Active |
Takes one of the offered values and reflects on the current status of the customer:
Default value: Yes |
Yes |
|
Industry |
Primary business activities of the customer |
IT |
|
Contact Person (internal) |
The person a customer shall contact in case of need |
Fares Daqqakkk |
|
Contact Person (external) |
The person a company shall contact on customers site in case of need |
Mandatory fields are marked with an asterisk in the table.
You will not be able to save the entry unless you fill in those fields.
To save the customer, click on the “Save” button in the bottom left corner to save entered data and continue working on the same item,
or “Save & exit” button if you want to exit this screen and get redirected to “Customers” database.
Note: The following assumes that "EveryFilemanager", "EveryNoteManager" and "EveryVersionHistory" apps are installed.
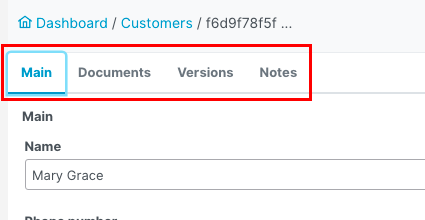
Other than filling in basic data in the Main tab, for each Customer entry, you can upload any related documents,
add notes concerning the particular Customer and see all versions of the particular entry.
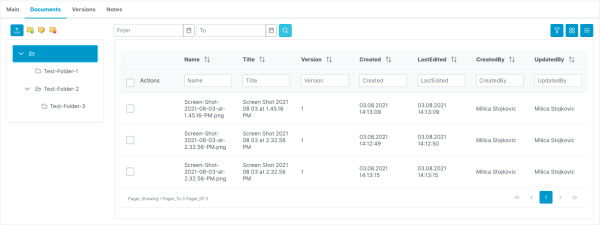
The “Documents” tab allows you not only to store any related data, but also to add folders and organize documents.
A file can be uploaded either in the “parent” folder that exists when you first open the “Document” tab,
or you can create a different folder to store documents in, which will be hierarchically placed underneath the “parent” folder,
like “test” folders in the image above.
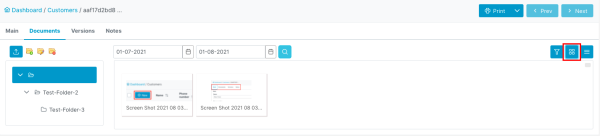
You can create different folder structures according to your needs and manage folder structure via the buttons shown on the left side of the image below:

First button on the left is an “Upload” button. Next to it, to the right side, there is a “Create folder” button.
In case this is the first folder you are adding, it will be automatically placed as a “child” of a default “parent” folder.
If you want to create a deeper structure, select the desired “child” folder, and then click on the “Create folder” button.
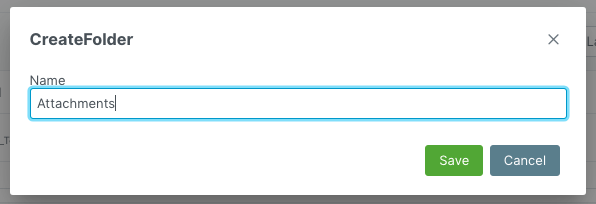
Clicking on this button will initiate appearance of a pop up dialog, where you will be asked to enter a name of the new folder.
Click on “Save” button when you finish.
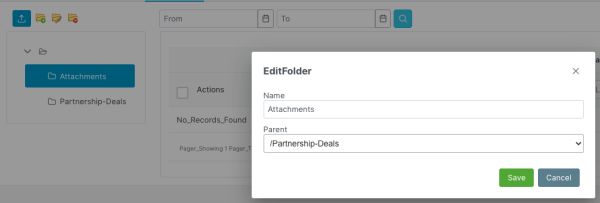
Next to the right is “Edit folder” button.
By selecting a desired folder and then clicking on this button, you will be able to change its name and manipulate the folder structure
by changing the position of this folder, by changing its parent folder in “Parent” field.
Finally, last button on the left side in the image above is “Delete folder”.
Select the folder you want to remove and click “Delete folder” button. Confirm deletion by clicking “Delete” or “PermanentlyDelete” button.
If you opt for “PermanentlyDelete”, it will be impossible to restore deleted folder.
Items that are removed by “Delete” option offer a possibility of being restored by an administrator.
Deleting a folder will also remove the content of folder, i.e., all files that were stored in the folder.
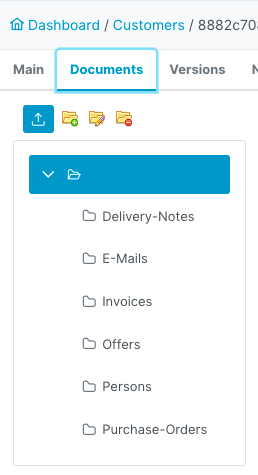
If the "EveryDefaultFolder" app is installed, every "Customer" instance will have the same folder structure that is described in “EveryDefaultFolder” chapter:
Clicking on “Upload” file button will cause appearance of a pop-up dialog,
where you will be able to choose a file to upload from your local or cloud storage.
File will be uploaded as a content of the currently selected folder.
On the right side of previously described buttons, there is a filtering option: you can choose the period of time within which documents were uploaded.
Buttons on the right side of the image above influence the appearance of the files in the “Documents” tab.
First button on the right side controls the visibility of the filtering option described above.
Second button will make uploaded documents appear as a list of icons for each file, like in the image below:
Last button on the right side will make uploaded files appear as a table and will provide multiple filtering and sorting possibilities.
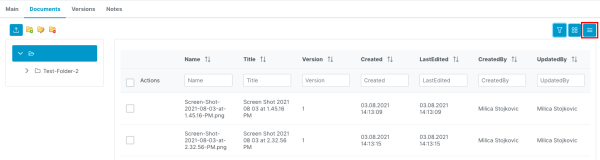
In this view, it is possible to sort files in ascending or descending order according to the following attributes:
Name, Title, Version, Created, LastEdited, CreatedBy and UpdatedBy.
It is also possible to search for a particular item according to the content of the same attributes.
“Version” tab corresponds to "EveryVersionHistory" app and it shows information about all different versions of the database item,
i.e., every time when an update happens within one database item, a new version is created.
It is possible to “rollback” to a previous version by clicking on a “rollback” button.
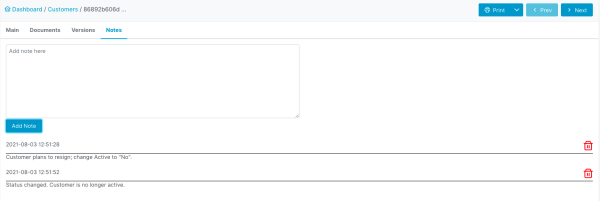
“Notes” tab corresponds to "EveryNoteManager" app and its purpose is to add any comments or notes related to a particular database item.
It shall be written as a text, and it will be saved with this entry.
For each note the creation tome is visible and the owner.
By clicking on a “Delete” button in the upper right corner of a saved note, it is possible to permanently remove it.